
 This post describes the building of the full-scale tensegrity tower. Ross Esselen and I built this in April 2004 at Wits University as a diversion from our studies.
Like the model in the previous post, the ratio of length between the ropes and the poles was 1:1.414. Materials used: 16 cane sticks (harvested from a campsite) and a 20m roll of lacing cord (nylon hawser-laid twine). Also cut yourself a spacer that is the length of your cord members, so that you can use this to measure your structure as you build.
 The staves need to be prepared by cutting all to similar length and marking out the points where the ropes will be attached using a marker (or a knife). The point where the ropes will be attached needs to be prepared by fitting a 'loop' that the 3 ropes can easily be tied to. The loop is attached to the pole using a constrictor, and the loop itself is made by joining the two ends with a sheetbend.
 Once the poles are prepared for use, lay them out in the grid, ready to tie the rope on, like the image on the left. If you can work on a flat, clean surface like the rooftop I have used here, that will make construction easiest. At Kontiki, building on long grass made this task much more difficult.
 Remember that the the very bottom and very top layers of horizontal cables will only be tied to 4 poles, each 1 unit away from the next. All other layers will be tied to 8 poles, which are spaced 1/2 unit apart. Remember to cut lengths of cord slightly longer than one unit, so that you can tie them on to the loops of each pole.Work systematically, from bottom to top, starting at the same end for every level, and work through tying the horizontal cables together. At this point remember also that you should be leaving one cord tied to only one pole at the edge of the structure so that when you 'roll it up' later you have the cord ready to tie.
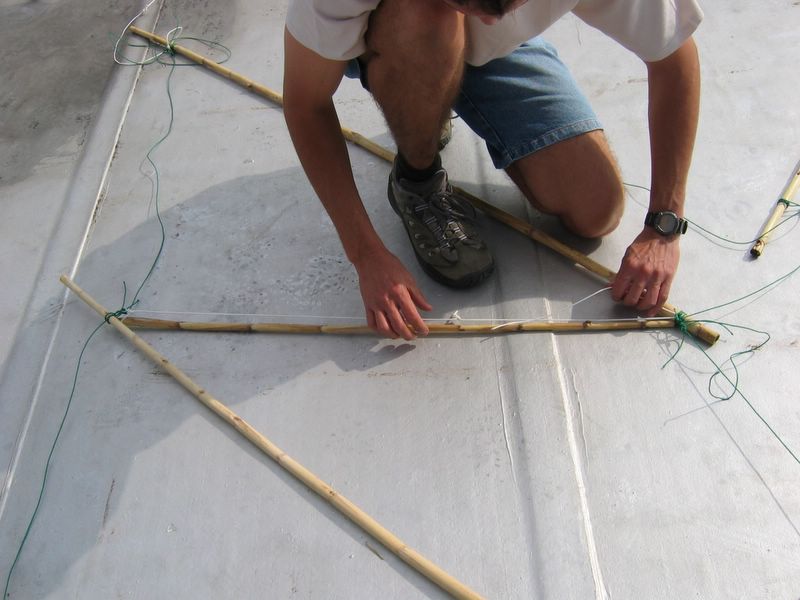 The diagonal cables need to be attached now. Remember that a diagonal links the bottom of one pole to the top of the next pole IN THE SAME LAYER. Also, remember that the layers lie in alternate directions (poles will lean one way in one layer and the opposite way in the next one, see the layout photos above or review this post). The 1-unit long spacer is now used to check that the length is right.
 We are aiming for a length of one unit here, the same as the horizontal cables, BUT we want to be able to adjust these so that we can level the structure out. Use a trucker's hitch as pictured on the left, to be able to adjust these later. Click through on the link to see how it is tied. Again, one end is tied to the top of a pole, and the other end to the bottom of the next one- I found it easiest to anchor the cord to the top end with a round turn and two half-hitches and tie the trucker's hitch at the bottom.

All of the ropes that can be tied 'in the flat' have been tied, and your tower should like the one in the photo above. You are now ready to start 'rolling up' the tower. As before, the key here is to start at one end and work systematically to the other.
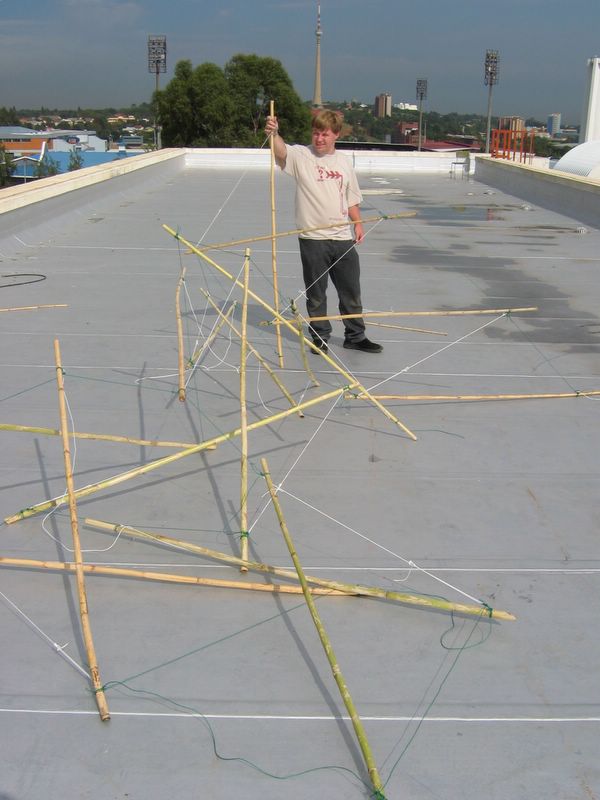 Tie all of the 'horizontal' cords first, remembering to measure that they are the correct length. Once they are tied, you will have the structure in the stage it is in on the left. Now work throught from bottom to top again, tying the final diagonal for each level. This is when the tower will start popping into shape, and strange things will happen- at times the structure looks almost as if it's alive- twisting and jumping as you tighten these chords. Measure them approximately and lock all the diagonal off with a slipped half-hitch so that you can easily adjust them later. Your 'tower' is now almost ready, before you stand it up for the first time, check that it looks roughly like this:
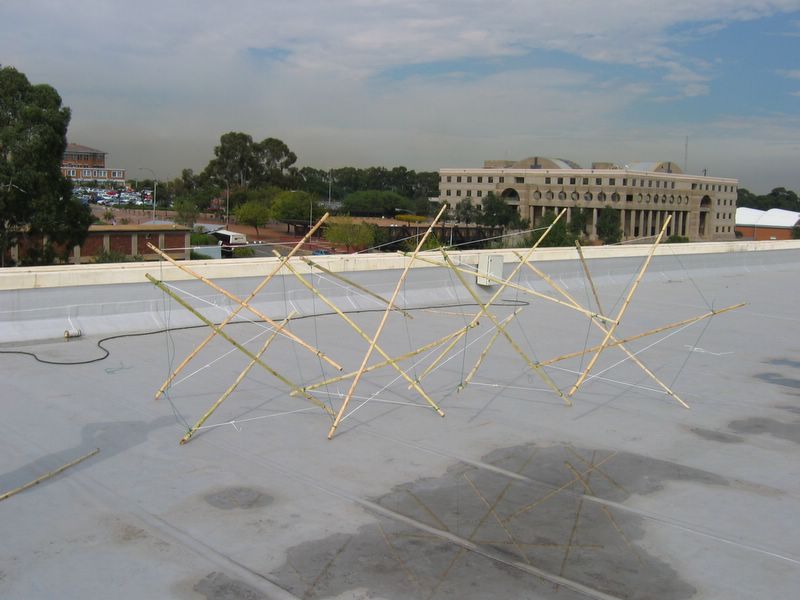
Next post: adjusting, levelling and placing the tensegrity tower.
4 comments:
Might an icicle hitch or some other friction hitch have advantages over a constrictor?
So how high was the final completed tower? Looks around 4m high from the pic... And what was the length of cane sticks you used in your structure?
I'm trying to build a tower of my own... so would really appreciate getting an idea of how big this tower really is...
Hi Harris.
The canes were about 2m long, and the finished height was about 4m initially (as the cords stretched the tower got a bit wider and shorter)
Thanks a lot peter, now let me see if i can actually build something that big.. or maybe even bigger... :-) I'll get back to you once i'v got somewhere...
Post a Comment