Measuring and setting out are important in pioneering projects, but it's
not always easy to use a tape measure and spirit level for
measurements. Over the next few posts, I'll cover some good on-site
methods for setting out a project.

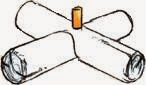
The most common measuring task in pioneering is probably finding the middle of a pole. Carl Nitzsche of
First Benoni Sea Scouts showed me this method, for which you'll need the pole you want to find the middle of, and one other pole at least half the length of the first one.
What we'll be doing is measuring where we think the middle is, checking our distance from each end every time. When we have it right, checking form the left and the right will give us the same point, because the middle is the same distance from both ends.
Let's work through the drawings:
1) line the end of the small pole up with one end. Lay it down next to the long pole and mark the end position on the long pole, either with chalk, a pencil or a blade.
2) now flip the pole over and line it up with the other end, marking the position against the long pole. The two marks are shown by the two green lines. If we had guessed well, the two green lines would be lined up. In this case, we haven't, so we move onto the next step:
3) pick a point on the short pole that looks closer to the middle of the long pole, and mark it on the long pole.
4) now flip the short pole over, line it up with the other end and lay the pole down, checking where the new position is. In this example, we guessed well and the two blue marks line up perfectly. That mark is the middle of the pole. If you don't get it right on the second iteration, you can keep going, checking the same distance from both ends, until you find the proper distance.
drawn on iPad Mini using Paper app and Just-Mobile AluPen

.jpeg)
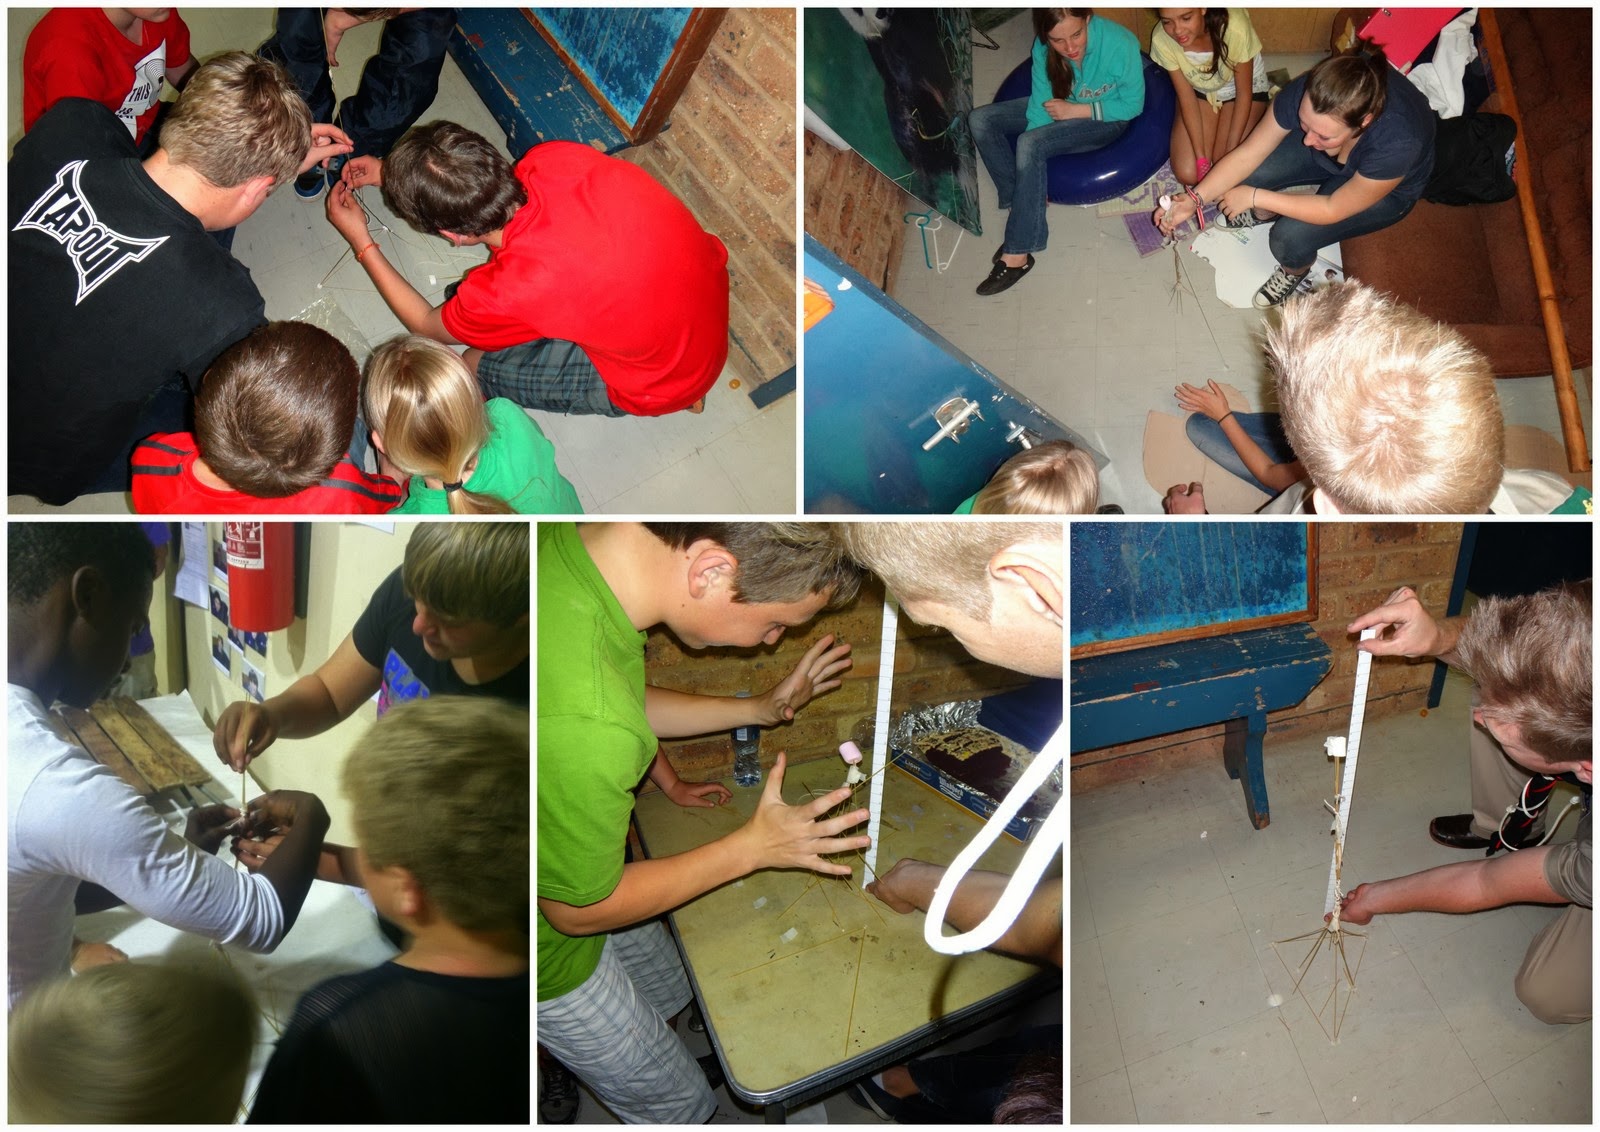 The rules are simple: each team has 18 minutes to build the tallest
possible freestanding tower (i.e. Not supported by anything other than
the floor) with the marshmallow at the top. My Rover Crew recently ran
this challenge with every Scout patrol in our district. Here are the results as an idea
of the heights that are possible:
The rules are simple: each team has 18 minutes to build the tallest
possible freestanding tower (i.e. Not supported by anything other than
the floor) with the marshmallow at the top. My Rover Crew recently ran
this challenge with every Scout patrol in our district. Here are the results as an idea
of the heights that are possible: