
(more sculptures, including dinosaurs, superheroes, biplanes and birds, on the sculpture tag)


 |
| Day and night photographs courtesy Akela Joy |

 Over the weekend, the East Rand Scout District in South Africa ran a public awareness day, where every group ran a public event to show that Scouting is flourishing in the community. Some groups held parades, some met in parks, some met outside shopping centres. My Rover Crew joined 1st Kempton Park Scouts outside a DIY shop in Kempton Park, and while they set up an information booth, we built this 4 metre high T-Rex.
 |
| The SketchUp model is available for you to download and view here. |
 |
| Sketches drawn in Paper on an iPad Mini |

 |
| All photos courtesy Terence Vrugtman |

- The Project! To, as a troop build a standing single letter of the “SCOUTS SA” Logo that can float on water to form part of the District Project.
- The Concept What are we doing? As a troop, you need to build a floating, self-standing letter of the “SCOUTS SA” Logo. You will be marked on: Project accuracy, general pioneering skill, on-spot knot testing, uniformity, spirit, model building and the final product. Use the below diagrams, rules and guidelines to build your letter (Troop Scouter has it) as best as possible to make this awesome project come to life.
- Base Guidelines and Rules Build a floating base that:
Must be made from ropes and poles/staves

- Must have 4 drums,
- Must be as close to 2.5m Wide as possible (Don’t destroy your troop equipment),
- Must be 3m Long,
- Must be a rectangular frame,
- Must have diagonal supports,
- Can have additional supports,
- Can have decking, not needed,
- Must have the ability to support your letter,
- Will have lashings necessary to support the structure, Letter Guidelines and Rules Construct a letter that:
Must be 3m High/long
Must be as close to 2.5m Wide as possible (Don’t destroy your troop equipment)
Must be 3D and have a depth of .05m (Measured from inside pole to inside pole)
Should be as close to the font as above in the concept image
Must have a hessian front to support the letter features
Should be as close to “letter shape” as possible (Hessian might be the key)
- General
- All aspects of the project must be built on the day
- Only Scouts (11yrs – 18yrs) may build. Adults may support and guide
- You must follow and stick to the times provided in the programme
- Judging will be done by the Scouters and Rovers of the West Rand District
- Scores will be vetted by the DC

 |
| photographs by Liesl de Weerd |


 What you need:
.JPG)
 The most basic idea is the static simple one. As you can see I only wrapped with aluminium foil the parts that were close to the fire (letters) and the lashings. You can also see that the 4 ropes holding the window are not directly connected to the window but to a thick metal wire connected to the window so that they would be isolated from the fire.
 A more complex yet fairly simple idea is illustrated in the second picture where the writings are divided into two parts (could be more than two) and folded on each other . The two grids are connected on one side with small metal rings from thick wire which acts as a pivot and at the other end they are only connected using a thin burnable rope which has been preferably dipped in oil. Once the letters catch on fire the rope burns and the two grids depart and reveal the message. You could also do this without a burned rope using a highwayman's hitch, so by pulling the right end you untie the knot and release the grids.
 Another cool idea is to have a sliding grid. In front of the crowd you have a big window with only part of the sentence/message/symbol and on another window behind it you have the other half. You have several cables connecting the hidden grid and the front window and you slide the grid forward on these cables. You should slide it after it's burning so the visual effect is more impressing.
 Another idea is to a have a swinging message. The grid is connected to a strong pivot above. The swinging is quite simple yet very cool and impressing.
 Another is idea is to use vertical pivots to rotate the grids.
 A more complex idea is the centrifugal one. In this idea you have a big thick pole like a log or a telephone pole or even several thinner poles tied tightly together. The main purpose of this is that the it will have enough mass to stay stable even though great power are exerted on it. Once you have the pole up in the air you secure it to the grounds with ropes and secure it to the ground at it's base with stakes. Around it you create a polygonal shape grid (a triangle is best because it's the strongest shape but if you have diagonals you can also build rectangle and pentagon). if you have a triangle you should use three words and not two as in the drawing. Once the triangle shape is finished(you should try build a wooden frame for each grid to keep it sturdy) you hang it in the air from the top of the poles using three thick ropes. Then you rotate around the pole a few times and you secure it while it's twirled. After you light the sentence you release it and it spins and reveals the message. Make sure you rotate it so that it spins in the right direction (so that people could read "hello big world" instead of "world big hello"), after that it should spins in both directions for a minute or two. Be very careful with this since there are very large and heavy things moving very fast. Keep people away at a safe distance and make sure the main pole is strong and stable.
 A different idea is to build a flipping message. You build two rectangles and secure them at a right angle. One rectangle is laying on the ground and the other is upright.you secure the common side to the ground. When you light it you light both words, and after a moment or two when the crowd has seen it you pull the ropes and flip it. It's very impressive and cool and usually it's for a message of change, like if the scouts go through something like getting a new rank, you write on one side the old rank and on the other the new one.
 Another way to deliver a message of change is to have a rotating grid (ehs7). You write two different words on each side of the grid and make sure there is a thick material between them so that you can't see through it. Basically you just spin it on it's pivot(usually a thick PVC pipe, if you use PVC or any other plastics make sure you wrap it in aluminum foil so that it doesn't melt or anything).
 A different creative idea is the falling balls idea (esh8). You place on the grid many many balls (also made from cloth) at a seemingly random order. But it's not really random at all- most of the balls are secured to the grid using a thin rope that will eventually burn so that the ball falls. Only a few balls are secured with a metal wire so they never fall. Once all the fake balls fall they reveal the message in the left balls(in the picture you can see the letter H revealed). It's usually a symbol not a sentence since it's quite difficult to create many letters in that method. but it's very cool since the crowd doesn't know what's the message and it is slowly revealed by the fire.
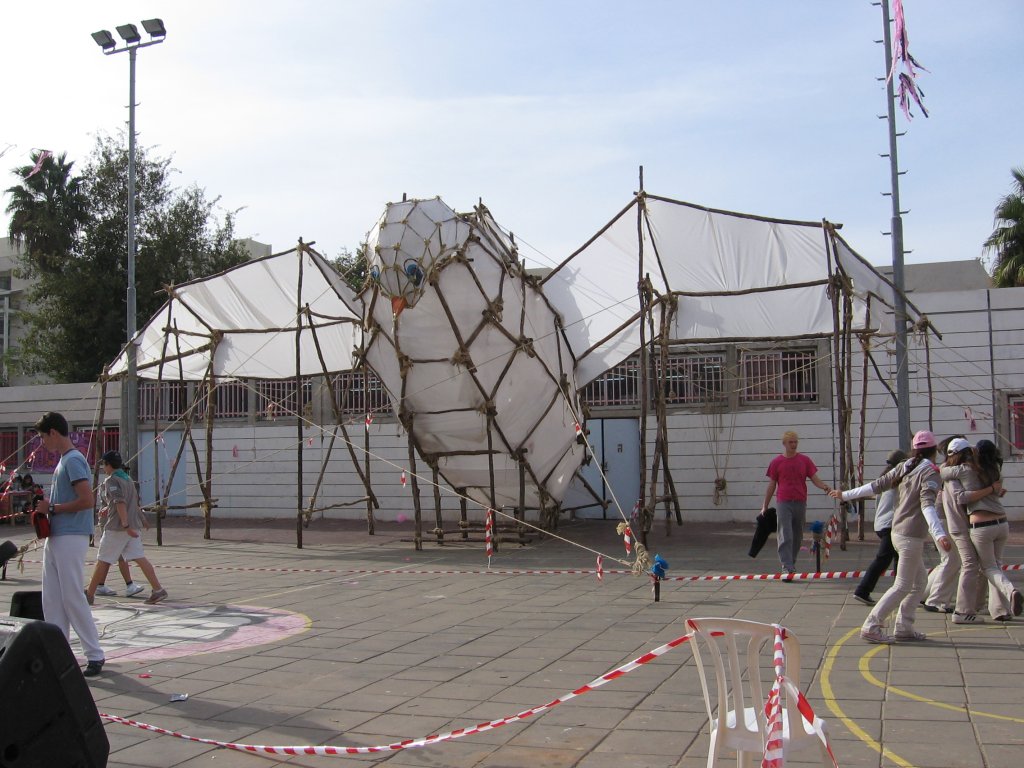

after we chose 2 or three project leaders for each structure they start designing the structures. they think of cool stuff to build that are connected to the main theme. after coming up with an idea we start designing. we try to get as much pictures of the object we want to build from different angles. we use the picture to define the breaking points that will create the wanted shape. we basically try to make round and complex shapes as simple as possible. instead of a round line we use a few different straight lines.

every structure we build is made up of simple shapes called "windows" connected. a window is basically a general name for anything that is a flat shape...
anyway, the people in charge of the structures look at pictures and determine where there windows will be placed within the object. after that they design the shape and size of every different window. most windows use basic geometrical shapes like squares, hexagons, octagons and decagons but they can have any shape you would like. the project leader then draw a accurate scaled sketch of each window and determine the exact size of each wooden stick and each connection.
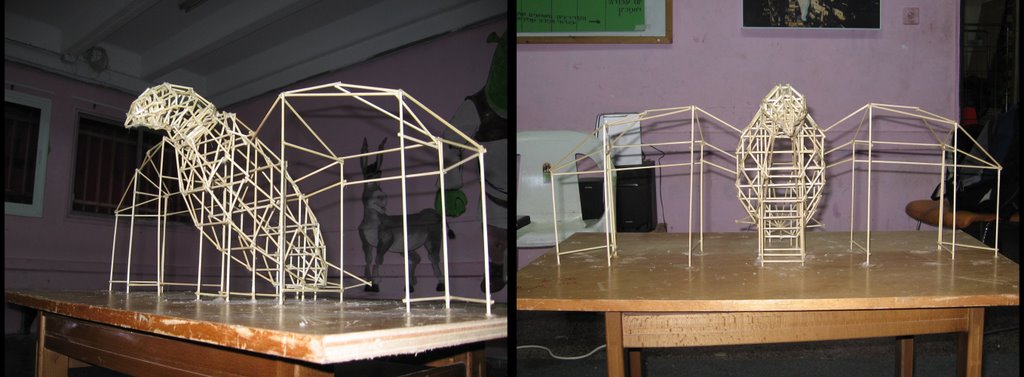
after drawing all the windows they build them in an accurate scaled model from small wooden skewers. after all the windows are built they connect them in the model and determine the exact length of each connection. they usually build the model at a 1 to 5 scale which means that every meter in realty is five centimeters in the model (technically it's a 1:20 because each centimeter in the model is equal to 20 centimeters in reality). after that they sometimes build a second or even a third model. the reason for building several models is that you can learn from each model and improve.
the last model is usually on a 1:10 scale, which means each meter in reality is ten centimeters in the model. the bigger model is built from bigger skewers.
...after completing the last model the project leaders determine a work plan and divide the work for the three days of building.
they determine specific deadlines for each stage of the work process and define the schedule for every hour. all of this accurate planning is done because three days isn't really a long time to build these huge structures and we can't waist any time while building. while building everybody must know exactly what there job is. usually there are about twenty to thirty people working on each structure at a time.
the planning and designing process takes about 2 months. in early June we start working on special accessories we need for these structures.by accessories i mean stuff like eyes for animals, teeth, toes and fingers, claws and even entire heads. everything that is small and lightweight and we can take with us to the camp inside a truck. we work on these accessories for three - four weeks ...
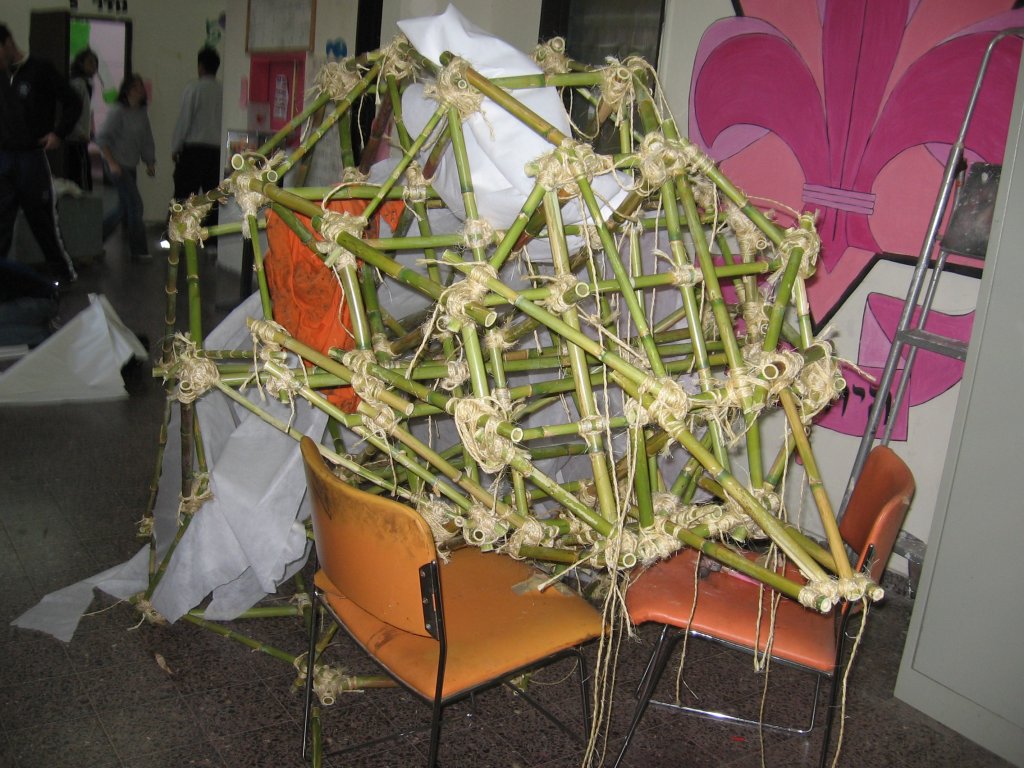
...we build these accessories from many materials. eyes and teeth are usually made from cloth sawed together and stuffed in something. for bigger shapes we use special net used in chicken coops that is very easy to manipulate and can also maintain it's shape. we cover this net in cloth or paper mesh. heads and larger stuff we build from small bamboo like sticks tied("lashed") together. some heads who require exact and round shapes are built from a construction metal and wooden planks, covered in cloth
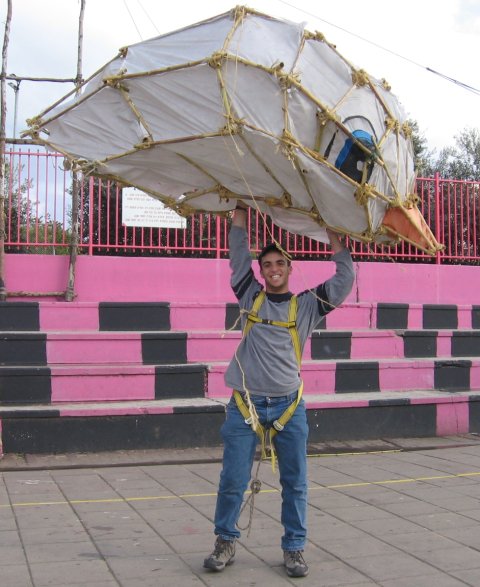
 The last few photos show the pigeon under construction, before the cladding is put over. This style of pioneering is a great test if a troop's planning,attention to detail and enthusiasm. Thanks again to Gal for explaining in such detail how to build this type of structure. Now that I have seen how it is done, I am keen to suggest this to my own troop (maybe you could show it to your scouts). Let's see how they respond to that...
 Starting with the hedgehog again- Here is a photograph of the model, showing some of the detail of the underlying structure. From this page (also showing Garfield, Santa Claus and the Frog Prince)
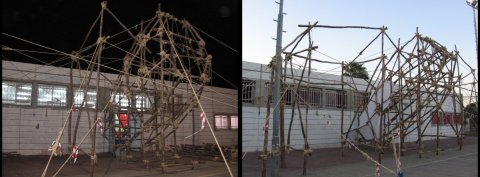
 Frog Prince: if you look inside the Frog's mouth you can see the 'lattice' frame that is holding the structure together- a grid of poles lashed together.
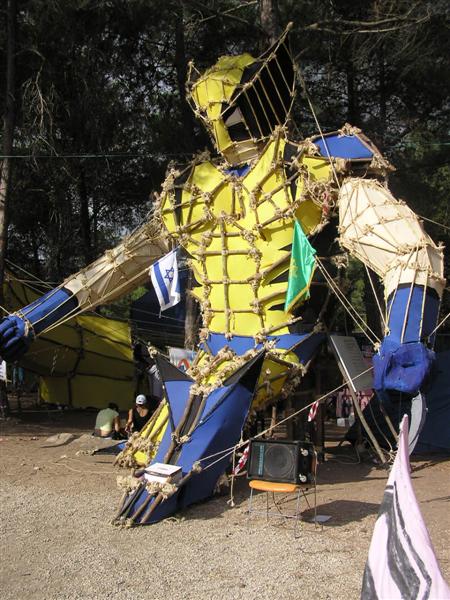 Wolverine: I like how the arms are sticking out, guyed by ropes. The six-pack is also a nice touch.
 Dragon: there are a couple of dragons, but I like this one for two reasons: Firstly, the temple that he is flying through is a good addition, and the way the curves of his body are made- if you look just behind his head you will see how the fabric has been left hanging to make a natural bend.
